Showing posts with label DIstrezz-It-All. Show all posts

Wednesday, January 5, 2011

Time for the Zutter 11 for '11 Blog Hop! WOOO HOOOOO!!!

Hello there!  Are you all excited to hop along with us during the Zutter 11 for '11 Blog Hop?  We sure are excited to have you hopping with us!  Welcome!  You should have arrived here from Lynne's blog.  Here is a list of the 11 blogs in order of the hop ~

Annette West
Emeline Seet
Fleur Smith
Jennifer Priest
Lea Sanders
Lynne Forsythe<------ You should have arrived from here
Pam Sandy <----- You are HERE now :)
Nan Paturzo -----> Go HERE next
Shelley Haganman
Vicki Flinchum
Bind-it-All Blog

What is in store for you on this blog hop journey?  Well besides the fun projects posted, there is also the chance to win PRIZES!  YAHOO!!!  Gott a love that, doncha think?  What kind of prizes you ask?  Well, each blog post you comment on gives you a chance for one of the fun prize packs from Zutter ~
a Zutter supply pack of "Owire, covers, Cover-Alls and surprises"
That is right, there will be ELEVEN prize packs awarded!  One from each blog!  So make sure you visit each blog, and leave a comment to be entered in the drawings!  I also have a little blog candy for those of you who are either already followers and leave a comment, or who sign up to be a follower of my blog and leave a comment.  Details posted at the end of this blog post.  :)

One last and final goodie for EVERYBODY is that there is a bonus discount happening at the Bind-It-All site right now.  You get an extra 11% discount on all regularly priced items when you shop and use this code at the Bind-It-All site -

CODE: Zutter11 Valid through January 31 only  Got it?  Great!


Alrighty then. I am excited to share my project with you today.  I decided that since I will turn 50 this year (YIKES!) that it was time for me to get my rear in gear and get back in shape.  To help me stay focused, and on top of this, I decided to create a journal style book for myself so I could track my progress and stay encouraged along the way.  My project is an 8 x 8 Mini, using the oh-so-FABULOUS Cover-Alls. I LOVE those things!  They work perfectly with the 8 x 8 Page Protectors.  I can edit my book every time I work out, and keep my writings clean, and legible too!  WOOO, how perfect is that?  Pretty dang sweet I think!  Take a peek at my book, then I will tell you how I created it.

Front cover ~


Standing view ~


Back Cover ~


Inside ~


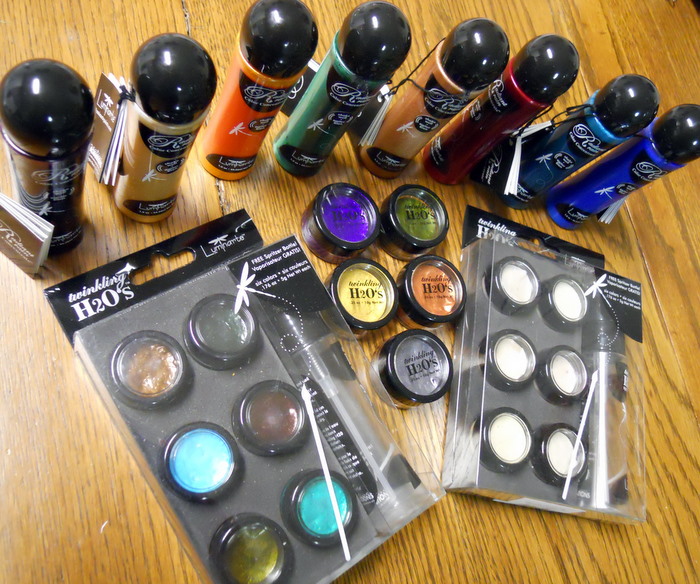
First, I used one of the 8 x 8 White Bamboo Spine Cover-Alls, and painted the cover with a Radiant Rain Paint Dauber by Luminarte.  I used the lovely green blue toned Guatamalan, it is very sparklie and lovely.  I just popped off the dauber tip, and used a paintbrush to paint deep rich color onto the cover. 
Next it was time to prepare some of the items I wanted to use on the cover.  First I grabbed my Distrezz-It-All, and distressed the edges of some paper from my stash, older Basic Grey and some pearly looking gold and white paper. I layered these on the front and back of the album.  I continued layering papers from my stash onto the album cover front and back.  Some of the paper was edged with Fiskars Scalloped Scissors (love those scissors, so quick and easy to create a bit of fun on paper edges). 
Next, I stamped one of my favorite stamps, Message and bottle onto white cardstock, then cut it out.  You can find this fun stamp at Red Lead Paperworks (GREAT store!), along with other fun vintage-y stamps.  I also used one of the Statement Stamps stamped on white cardstock(musical notes on the bird branch above) and painted it with a Radiant Rain Paint Dauber (Mallard).  I used the Hot Cinnamon Radiant Rain Paint Dauber on the body of the bird (posted about this in mid December, check it out).  I used Eygptian Gold on a few embellies I planned to use (some Jillibean Soup Journaling Sprouts, among other things.)
Time to start layering everything together!  I pulled some letter stickers out of my stash, including Thickers, and some My Little Shoebox  and other small letter stickers.  Everything was glued down, and lots of bling came next.  Gotta have some sparkle to get me through those workouts!  ;)  I also used rubons, several different journaling pens, ribbon, chpboard shapes, and puff and shiny fabric paint.  Lastly, after the Stickels had dried on my bottle, I used some Glossy Accents so the bottle looked like it was glass.  I wanted the glass bottle to look like it was holding sifting time. 

Here is a close up of the cover front, kind of on an angle so you can see the dimension a bit better ~


Now it was time to work on the inside of the album!  I took 2 packages of the 8 x 8 PrePunched Page Protectors, and sandwiched them between 2 sheets of the Movable 8 x 8 Page Protectors.  Next, I grabbed the insert from the Cover-All, and bound everything together using the 1 1/4" Antique Silver O'Wires.  I slipped them into the album. 
Time to add my calendar pages!  I printed each month (I used Outlook Calendars, feel free to use your favorite site) and cut it and folded it to fit into a Permanent Page Protector.  I want to be able to slip the calendar page out of the Page Protector and notate what I did for a workout each time I work out.  The hubs and I just joined the beautiful, beautiful new YMCA in Niles, so we are going to seriously work out.  Anyway, after I had the 12 Permanent Page Protectors filled with one month each of the calendar, I labeled them using bits of scrap paper that I edged with my scalloped scissors.  I then stapled them onto each page.  The first Moveable Page I labeled Goals, and the last Moveable Page I labeled Notes.  Almost ready!
Lastly I flipped my book over, and put some sparklie stickers on the back with the word Remember, then I wrote this -
If you think you can't, you are probably right.  Get rid of your stinkin' thinkin'!  That is going to be my mantra, and I am going to add different quotes that I find inspirational to this back cover.  It will be kind of my doodle word page, easily visible since it is the cover.  I also have a notes page inside in case there is something private I want to remember.  I know I will add bits and pieces of things that catch my interest, and write notes all over my workout book, that is the purpose of it.  Kind of like an art journal workout book.  I can easily add pages using the 8 x 8 Moveable Page Protectors, and put them anywhere within the book.  Love that!!!  All in all, I am very happy with my workout mini book, and can't wait to be inspired every time I use it! 

OK, thank you for patiently reading my post.  Here is a picture of a few of the goodies that will be sent to one lucky blog follower who leaves a comment on my blog during the Zutter 11 for '11 Blog Hop ~


There will be a few other items included as well.  Gret for Valentine's Day card, tag or scrappy projects!  All you have to do to be entered is sign up to be a follower of my blog and leave a comment on this thread.  If you are already a follower, then all you have to do is leave a comment on this thread.  Easy peasy, right?  Can't wait to hear from you!

Well, time to visit Nan, the next stop on the blog hop.  Happy Hopping!!!  Take care ~ Pam

Sunday, November 28, 2010

Hope you had a happy and safe Thanksgiving!

I hope all of my USA friends enjoyed a happy and safe (and delich!) Thanksgiving.  We are all heading into December, no matter where we live, isn't that amazing?  I have been busy as a bee working on projects and playing with Twinkling H2Os and Radiant Rain products, and I am in love.  :)  They are vibrant and gorgeous, and easy peasy to work with!  I promised to show you some projects I have been working on, so here they are.  I used some fun stamps from Red Lead and some Stazon ink to create a vintage base to work with.  Here are a few cards ~
I used some vintage fabric on this card, I love how it turned out.  Wish you could see all the sparkling loveliness irl, it is very pretty!
Next, I used a different Red Lead stamp, as well as a sentiment stamp from another company and created two similar cards ~


I will be posting directions on the Bind-It-All Blog soon on how I created the bottom card (stay tuned!).  I used the oh-so-fabulous Distrezz-It-All, and it was boatloads of fun to create.  Of course, I also used a few of these sparklie lovelies~


I have been playing with these shimmery sparklie paints like crazy, and will show you a few other projects in the next few weeks.  I have to say, if you love sparkle, then you DEFINITELY need to pick up some Radiant Rain and Twinkling H2Os!  Oh my, they are so fun and easy to work with and they add boatloads of color! 

I finished the grandkiddies Santa Countdown, YAY!!!  I also finished one for our house, because we definintely need one here too. :)  Here is a pic of one, with the extra set and extra numbers below.  It was pretty time consuming to create, I was surprised.  But then again, each little number or santa was like a bitsy little quilt, so I guess I shouldn't have been.  They are cuter that cute though, wish you could really see them ~


I have also been working on other bits and pieces of things.  Here are a few belts I zipped together super quickly for the grandkiddies stockings ~


Here is a wee little hair bow and belt for my three year old granddaughter who loves Mickey and Minnie and the Mickey Mouse Clubhouse ~


I have been decorating for Christmas too.  The last few years have been very crazy and sometimes not so happy for our family.  We have all gone through an awful lot, but thankfully things are a bit easier for us now.  Hopefully they will continue this way for years to come.  :)  Anyway, I decided that I need to make things a bit cozy this year, even if I don't have boatloads of time to do so.  I used to decorate like CRAZY, spending weeks to do so.  I no longer have that kind of space to decorate, nor do I have that kind of time.  But I do have some spots that have just the right amount of room, and I have been sneaking in a bit of decorating time here and there as I can.  Here is a pic of my one super bitsy little FUN and BRIGHT pink tree, located on our recycled island in the basement (the fabulous big and sturdy oak unit used to be in a library in it's previous life) ~

closer view

I found some darling little pink tiny trees at Hobby Lobby, and since they were half off, they had to come home with me.  Don't you like my hubbies Harley wall hanging over my sparklie pink stuff?  ;)  he he, lovely!

Here is a pic of one of my fav trees.  I bought this tree in Shipshewana over a dozen years ago.  I wanted a skinny tree, and they were hard to find then.  I was thrilled when I found this one! It used to be located in our hallway at our old house.  We had a lovely wraparound staircase and the hall between the kitchen, den, basement, and front entrance was nice and big (the foyer).  I wanted a tree there, but not one that would take up a lot of space.  So this tall skinny tree was perfect.  I bought the tree topper in another shop in Shipshewana, I loved the contrast between old metal and the glitter, then I made over 100 star and heart ornaments in two sizes and several differnt tones of ivory for the tree.  Of course I used lots of chunky glitter!  I still hang those ornaments on this tree, in addition to a few different red ornaments and some glittery coated baby's breath.  It is now in our dining room between some of my favorite artist (Nancy Noel) pictures (still have to put the tree skirt under the tree).  Hope you like it ~

Last year when I went to Frankenmuth with friends, I found a beautiful old world style glass cardinal ornament.  Can you see it clipped to the tree in the pics below?


Of course, we also have our smores tree, and our regular Christmas tree put up.  I did not take pics of those yet, so I will share them next week.  My granddaughter and grandson love the smores tree, and keep putting items near it to play with.  It is on our fireplace hearth, so it is a perfect height for them to "arrange" things.  :)  They are very creative, gotta love that!

Well friends, that is it for me this week, I need to get my rear in gear and finish a few tasks.  Don't forget, if you are in the market for a new Bind-It-All or Distrezz-It-All, they are on sale for a limited time.  Check them out here

Hope you all have a safe, happy, and creative week ~ Pam

How did I come up with Pam's Eclectic Stuff?

Pam- that is me. :)

eclectic --adj.- selecting what seems best of various styles or ideas
*Since I like a huge variety of arts and mediums, this seemed perfect, we will talk about the best of various styles or ideas.

stuff- The noun stuff has 7 senses -
1. material, stuff -- (the tangible substance that goes into the makeup of a physical object; "wheat is the stuff they use to make bread")2. whatchamacallit, stuff, whatsis, sundry, sundries -- (miscellaneous unspecified artifacts; "the trunk was full of stuff")3. stuff, clobber -- (informal terms for personal possessions; "did you take all your clobber?")4. stuff, stuff and nonsense, hooey, poppycock -- (senseless talk; "don't give me that stuff")5. stuff -- (unspecified qualities required to do or be something; "the stuff of heros"; "you don't have the stuff to be a United States Marine")6. stuff -- (information in some unspecified form; "it was stuff I had heard before"; "there's good stuff in that book")7. stuff -- (a critically important or characteristic component; "suspense is the very stuff of narrative")

*What more needs to be said? I really thought about using Pam's Eclectic Sundries, but I thought that might be tough to remember. :) Stuff is easy and conveys a variety of meanings. I like the definition- miscellaneous unspecified artifacts. I also liked whatchamacallit, but that is a lot of typing. :)

So there you have it!